Disclaimer: This blog and all associated research are part of my personal independent study. All hardware, software, and infrastructure are personally owned and funded. No employer resources, property, or proprietary information are used in any part of this work. All opinions and content are my own.
I’ve been wanting to build a dedicated machine-learning lab for malware research for a while — not a giant GPU workstation or a cloud cluster, but something smaller, reproducible, and fully under my control.
So I decided to start with an embedded system: the NVIDIA Jetson Orin Nano.
This device will become the first node in my personal malware research ML lab — a place to experiment with behavioral data, lightweight models, and reproducible experiments.
This post documents the first step: unboxing, hardware setup, and software installation.
Unboxing
The Jetson Orin Nano developer kit arrived in a compact box. Minimal packaging, straightforward layout.
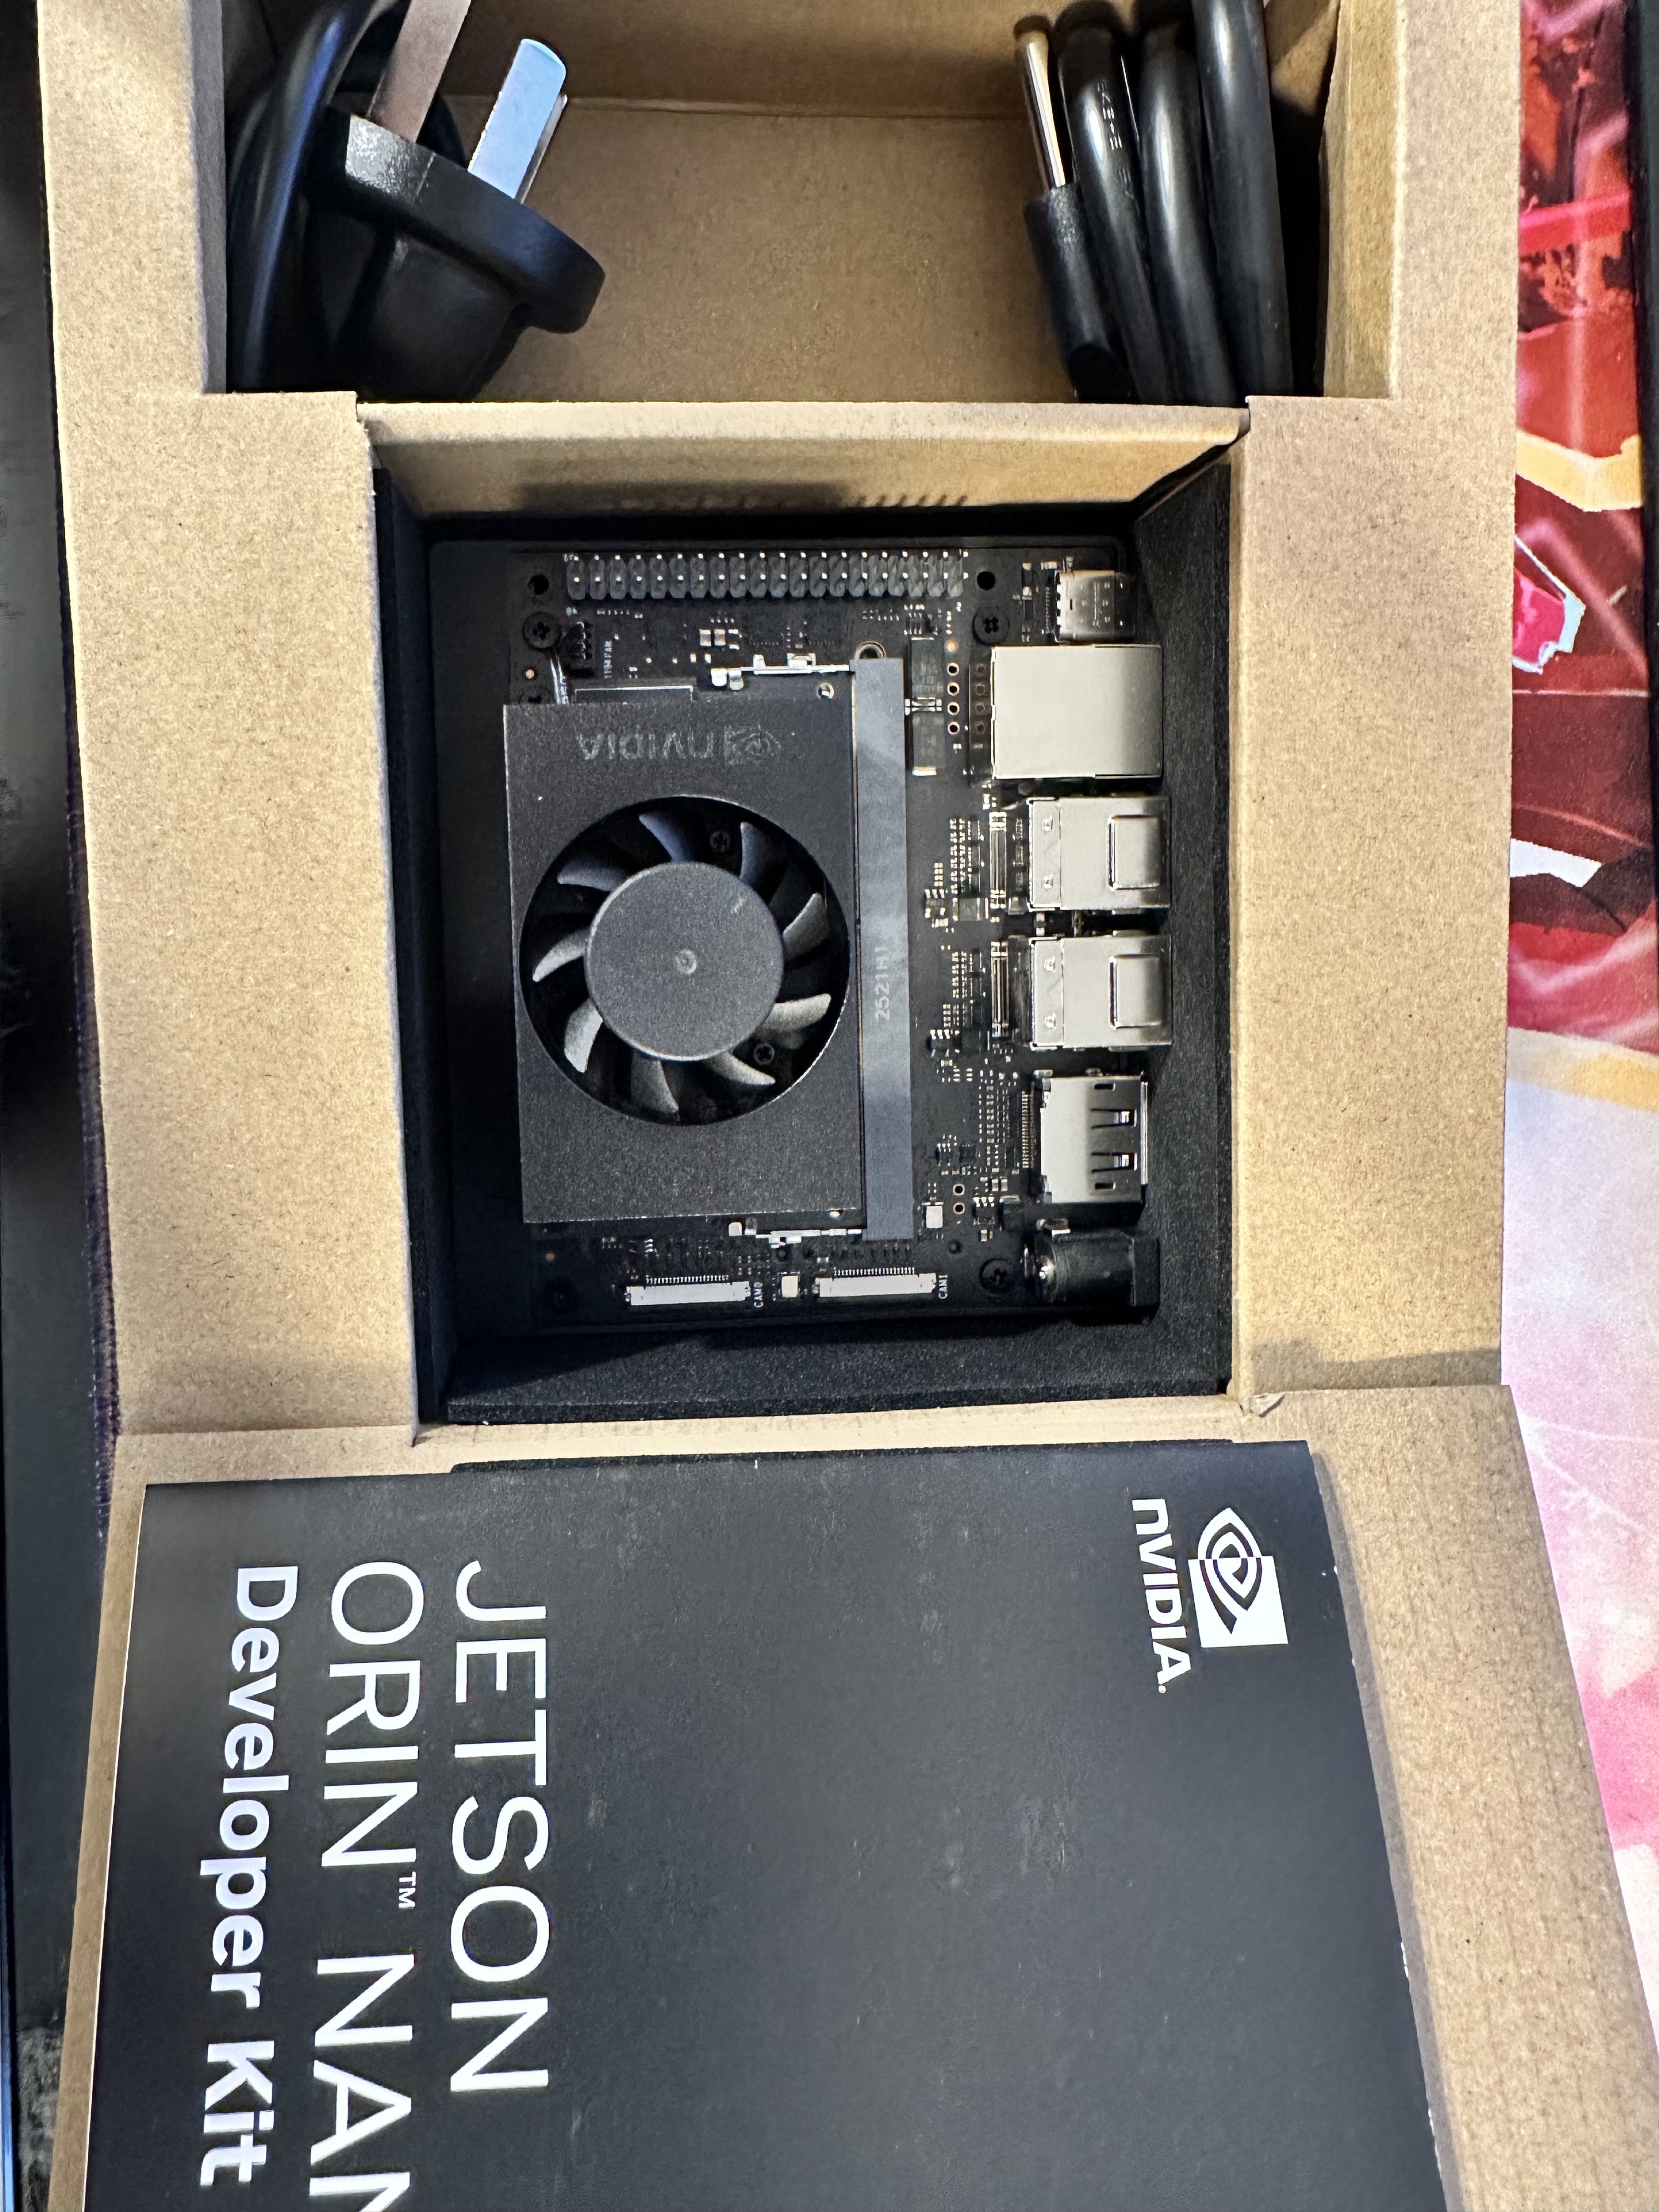
Inside the box:
- Jetson Orin Nano board
- Preinstalled active cooling fan
- Power adapter
- Documentation
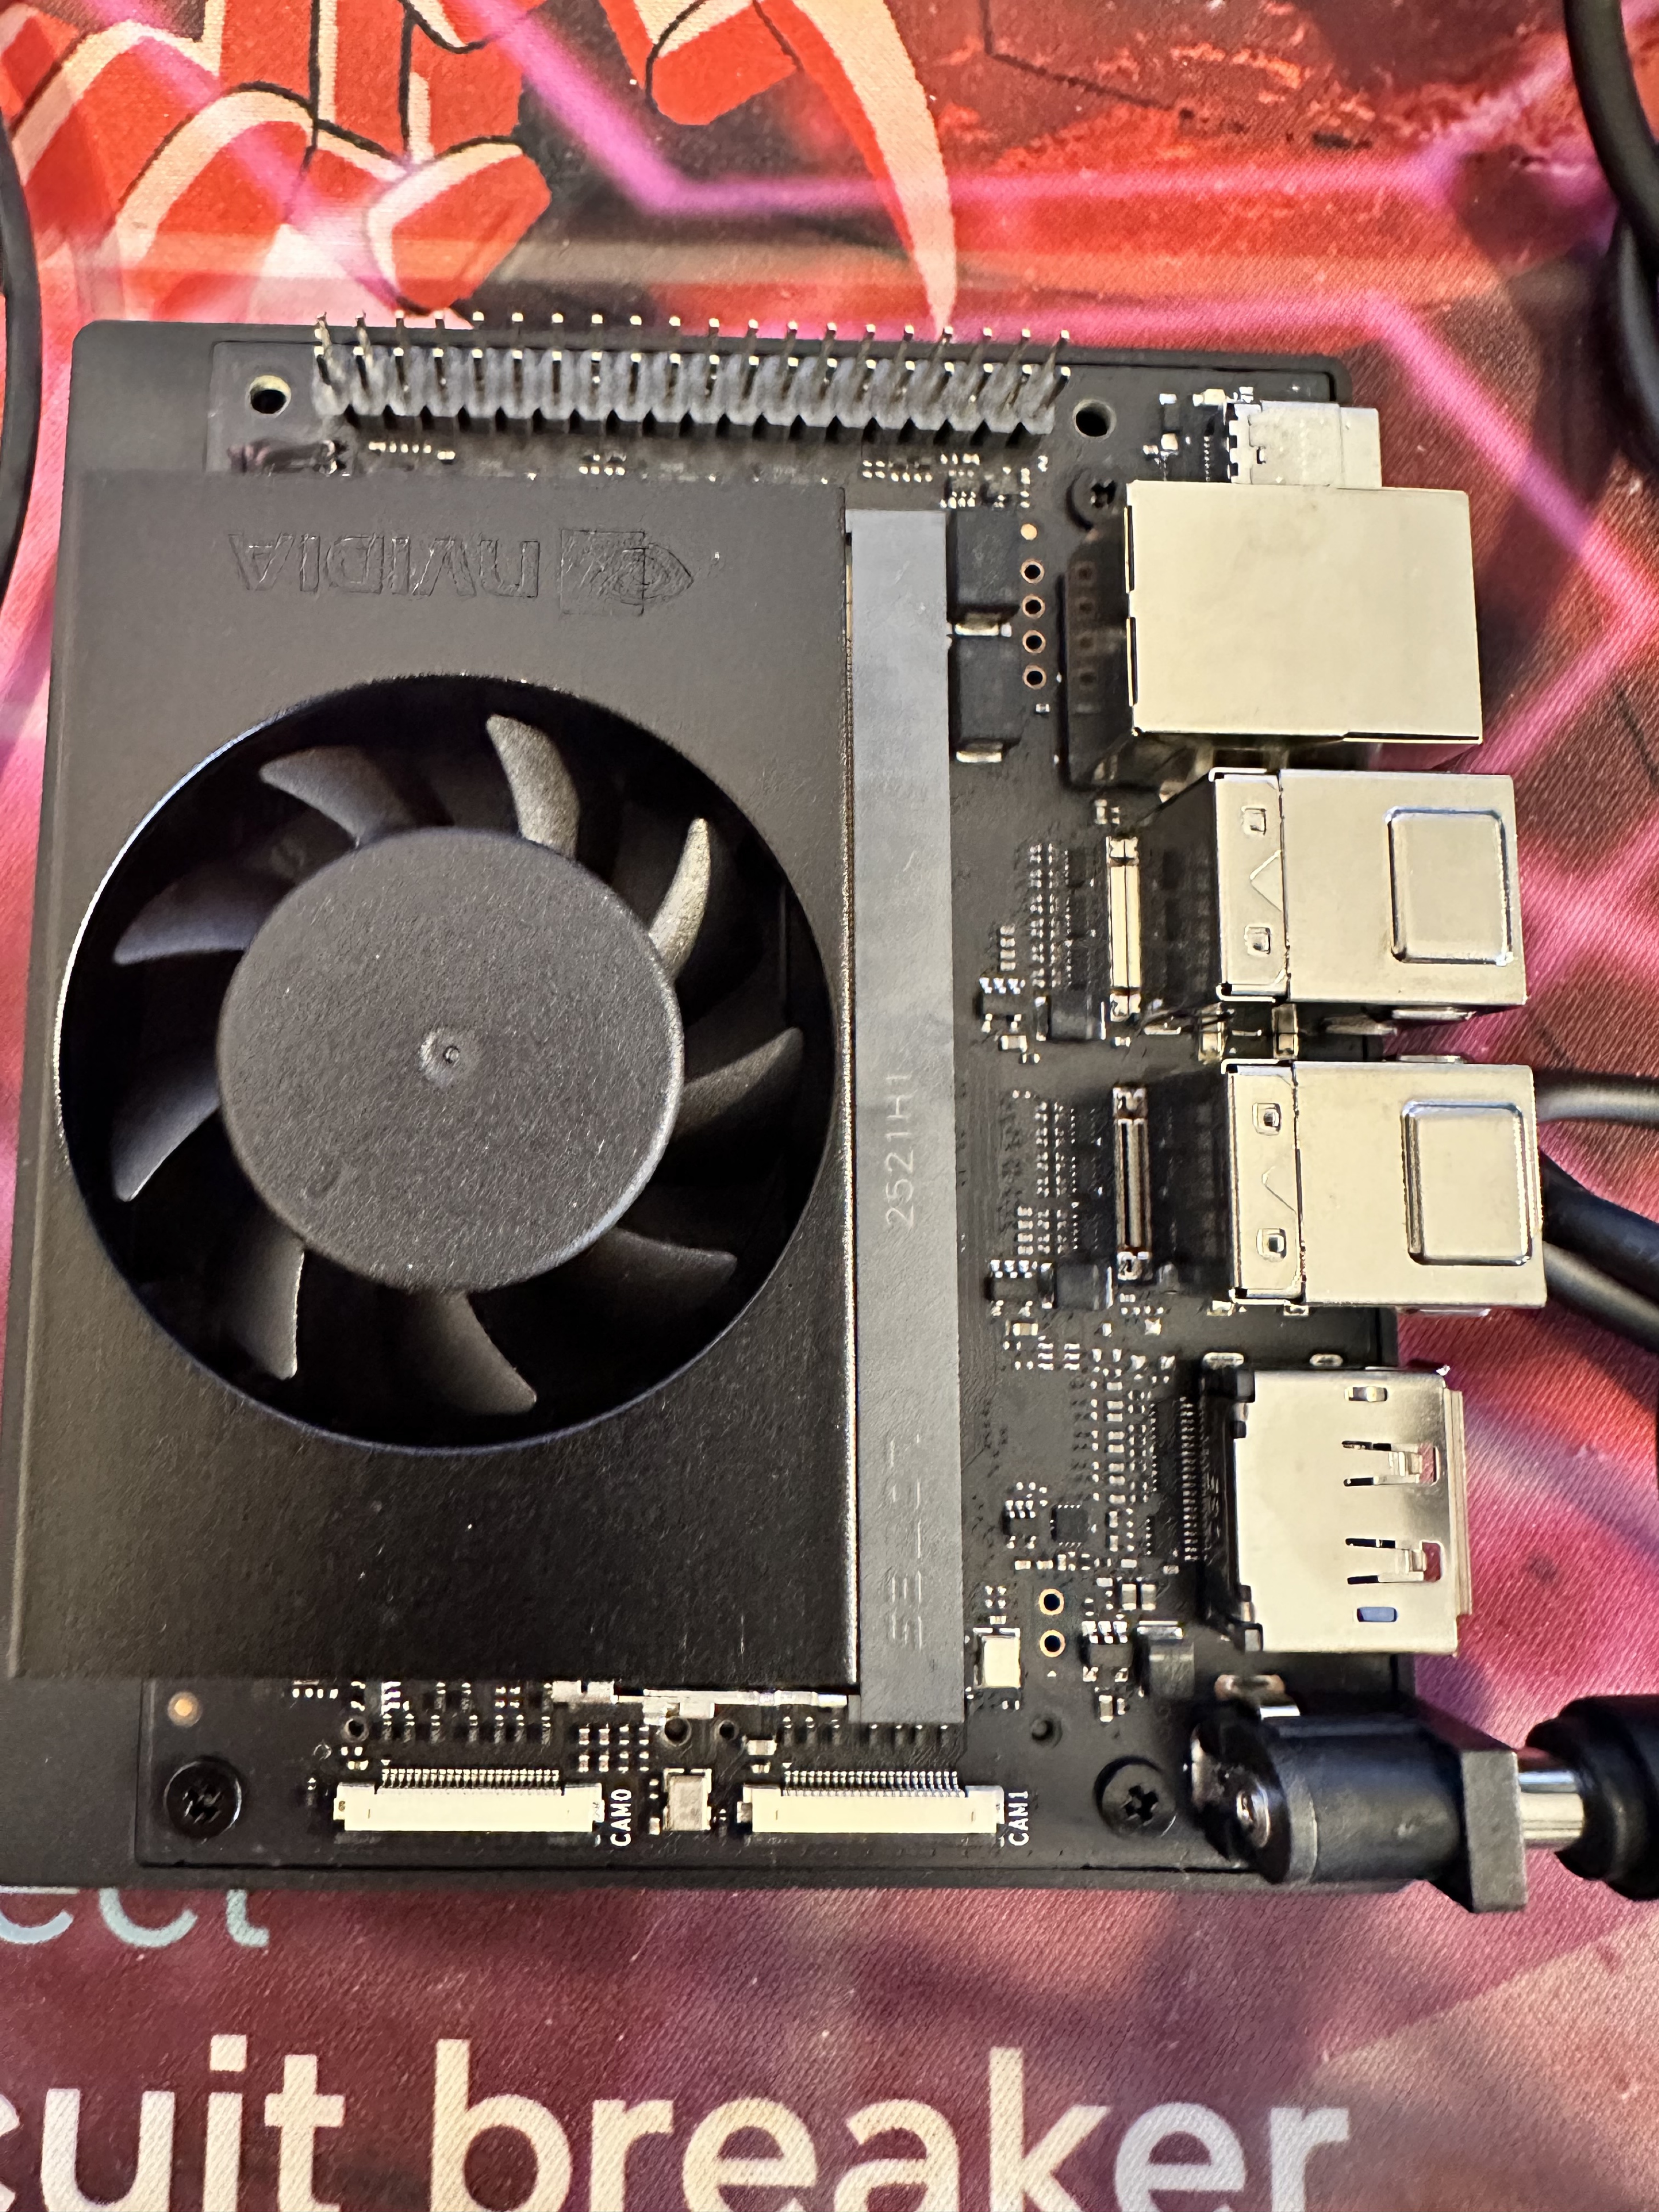
The board itself is small but dense — clearly built for serious embedded ML work rather than hobby use.
Installing NVMe Storage
For this lab, I want the system running entirely from NVMe instead of microSD — faster I/O matters when loading datasets and building containers.
I installed a 1TB Kingston 2230 NVMe as primary storage.
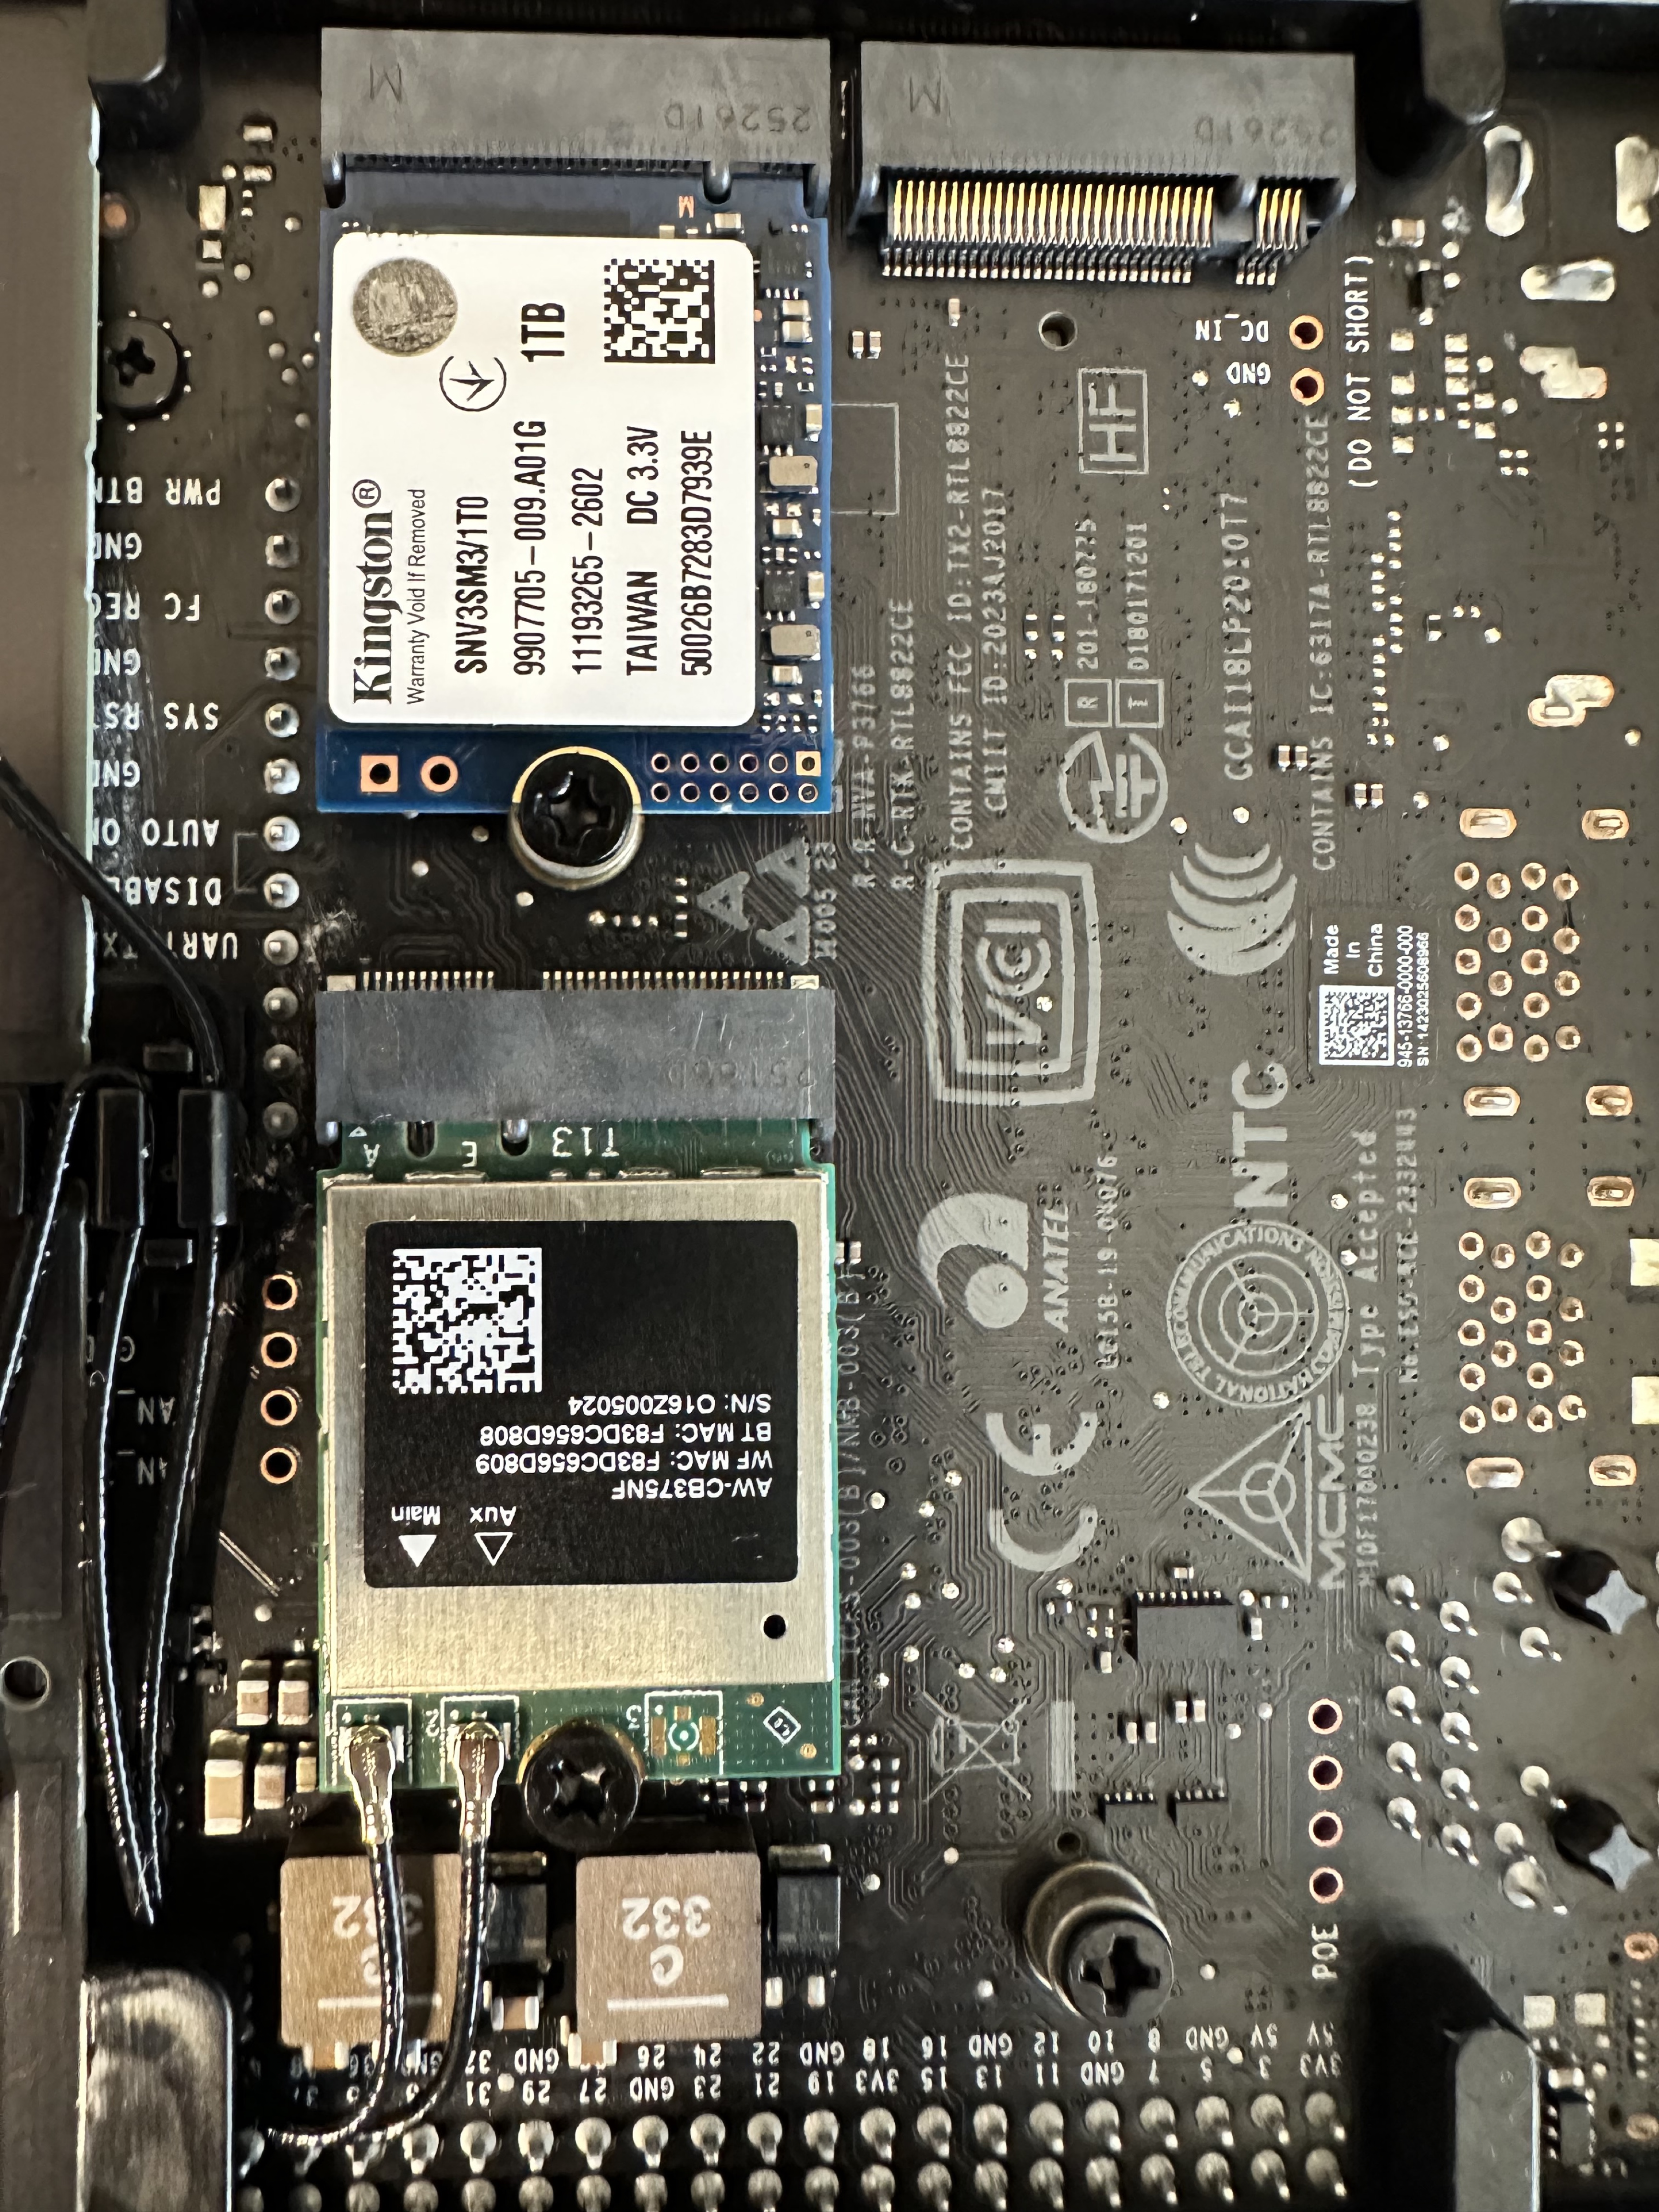
Installation steps:
- Remove bottom cover
- Insert NVMe into the M.2 slot
- Secure with screw
- Reassemble
This gives me faster dataset access, better reliability for Docker workflows, and easier environment rebuilds. At this stage, storage performance matters more than raw compute.
First Boot
I first booted using a microSD image to bring the system online.
Connected:
- HDMI monitor
- USB keyboard
- Ethernet
- Power
The board booted into the standard Jetson Ubuntu environment without issues. Fan noise is minimal and thermals are stable.
Flashing JetPack to NVMe
The goal is to run everything from NVMe. The process:
- Flash the JetPack image to microSD
- Boot from microSD
- Use the SDK Manager or
nv-l4t-usb-device-modeto flash NVMe as the root filesystem - Reboot and verify the system is running from NVMe
After switching root to NVMe, the system felt significantly faster — boot times, package installs, and container pulls all improved noticeably.
Current storage layout:
NVMe → OS + Docker + datasets
microSD → optional backup / recovery
Base System Setup
Once booted into NVMe, I ran the baseline configuration.
Update system
sudo apt update && sudo apt upgrade -y
Install essential tools
sudo apt install -y \
    git \
    python3-pip \
    htop \
    tmux \
    build-essential
Verify CUDA
nvcc --version
# CUDA compilation tools, release 12.2
Check GPU and system stats
tegrastats
# Reports CPU/GPU utilization, memory, and thermal info in real time
Everything came up healthy — CUDA recognized, GPU accessible, thermals in check.
System monitoring with jtop
tegrastats works but is hard to read. A much better option is jtop, a terminal-based dashboard built specifically for Jetson devices:
sudo pip3 install -U jetson-stats
sudo systemctl restart jtop.service
jtop
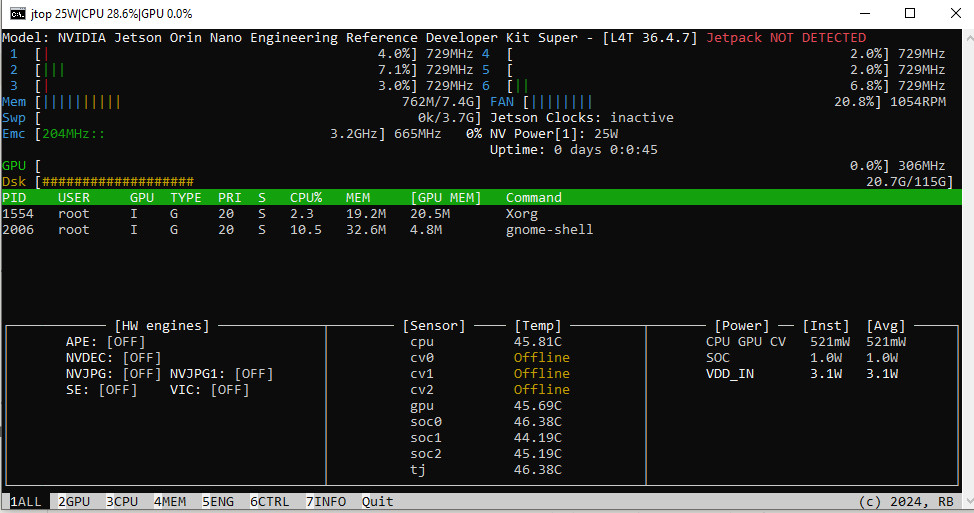
jtop gives a real-time overview of CPU/GPU utilization, memory usage, temperatures, fan speed, and power consumption — all in one screen. Much easier than parsing tegrastats output manually.
Docker Setup
Reproducibility is a priority, so most work will run inside containers.
sudo apt install -y docker.io
sudo usermod -aG docker $USER
Log out and back in (or reboot) for the group change to take effect, then verify:
docker run --rm hello-world
Jupyter Container
To make experimentation easier, I set up a GPU-accelerated Jupyter environment using one of NVIDIA’s L4T PyTorch images:
docker run -d \
  --name jetson-jupyter \
  --runtime nvidia \
  -p 8888:8888 \
  -v ~/workspace:/workspace \
  -w /workspace \
  dustynv/l4t-pytorch:r36.4.0 \
  jupyter lab --ip=0.0.0.0 --port=8888 --no-browser --allow-root
Grab the token from the logs to access the notebook:
docker logs jetson-jupyter 2>&1 | grep token
This gives me a notebook environment with PyTorch and CUDA support for quick dataset exploration and model prototyping — all containerized and reproducible.
Why Start with Jetson?
Most ML work begins with large GPUs. I’m intentionally starting small.
The Jetson Orin Nano packs an Ampere GPU with 1024 CUDA cores and up to 8GB of unified memory — enough to train small models and run inference on real malware datasets, but constrained enough to force disciplined experiment design.
This lab is meant to:
- Build reproducible data and training pipelines from day one
- Experiment with behavioral telemetry and execution traces
- Test lightweight models that could realistically run at the edge
- Avoid cloud dependency for the core research loop
If a model works well on Jetson, it’ll work anywhere. That’s the point.
What’s Next
The next post will cover the full ML environment setup:
- Custom container images with PyTorch + malware analysis tooling
- Workspace and dataset storage layout
- Experiment tracking with MLflow or Weights & Biases
- First dataset ingestion